Here is an exciting feature of Copywhiz. It can now automatically copy files in a folder structure based on file properties such as file name, file extension, file type, file size, date modified/created/access and also mp3 metadata like artist, album, genre, title etc.
If you have your project documents, pictures, music files, video files scattered all over your hard drive, this tool will set it all right in few minutes.
Manually copying these files and then pasting them to folders is very time consuming, especially if they are large in number. For this reason, we just dump these files in a few limited folders and end up in a clutter. This reduces our productivity.
What is Copywhiz?
Copywhiz enhances your file-copy experience by letting you to have more flexibility & control over the file copying and backup process.
Here is how Copywhiz makes file copying a breeze:
- Copy only new or modified files
- Easily pick files by name, extension, folder etc from bunch of folders
- Automatically organize files based on file attributes and metadata
- Copy files to multiple folders/computers
- Copy files from multiple folders and paste them at once
- Sync files between source and destination
- Pick files from multiple folders and compress in single .zip file
- Schedule file backups
- Verify copied files for data integrity
- Retain security attributes of files & folders (ownership/user access)
- Several more hidden nuggets designed to make your file-copy task easier.
Organize files by attributes
Here is a short video to guide you:
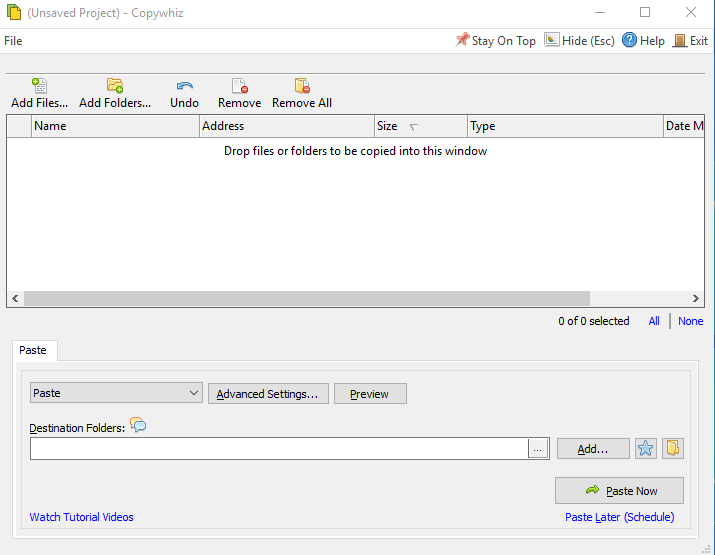
- After you select your files in Copywhiz, go to the destination folder and Choose ‘Copywhiz -> Paste Advanced’.
2. The Copywhiz main window will open. Choose the Advanced Settings Tab from there.
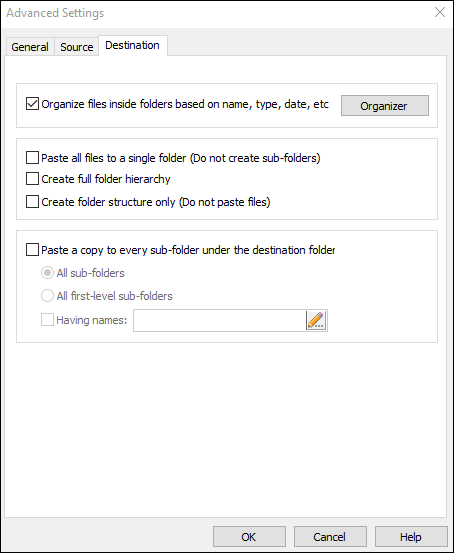
3. Go to the Destination Tab and choose the ‘Organize files inside folders based on name, type, date, etc.’ option.
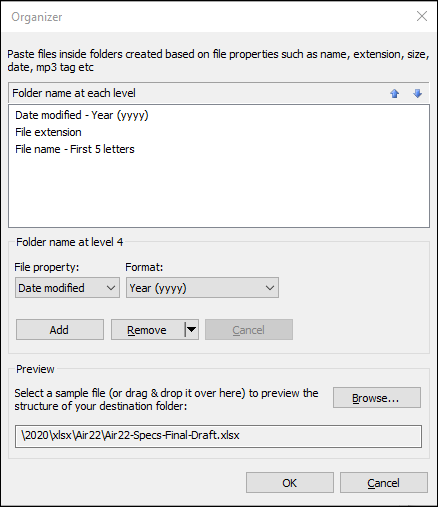
4. Open the Organizer window. Choose the file property from the drop-down. You can also add multiple criteria and easily reorder, update or remove the criteria.
There is also a Preview option so you can view a sample folder structure.
5. Click on OK and proceed with ‘Paste Now’ option.
Why this feature?
This feature saves a lot of time and effort. You don’t have to sit down and sort your files anymore. Copywhiz does it for you in a matter of seconds.
You can also schedule the project to automatic organize your files at specific intervals using Copywhiz.
Learn more about Copywhiz. Download the free trial from here.
For short tutorial videos, Check out this page.
Subscribe to our YouTube channel for interesting videos.
Check out our other cool products.
Have a good day!
Thanks for reading :)