When managing files in Windows, there are times when you need to gather files from multiple locations and copy them to a single destination folder. While Windows’ built-in Xcopy command is a powerful utility for file copying, it often lacks user-friendliness and advanced features. That’s where Copywhiz, a versatile and user-friendly tool, shines as a replacement for Xcopy. In this blog, we’ll explore how to use Copywhiz to streamline the process of consolidating files into a single folder.
What is Copywhiz?
Copywhiz enhances your file-copy experience by letting you to have more flexibility & control over the file copying and backup process.
Here is how Copywhiz makes file copying a breeze:
- Copy only new or modified files
- Easily pick files by name, extension, folder etc from bunch of folders
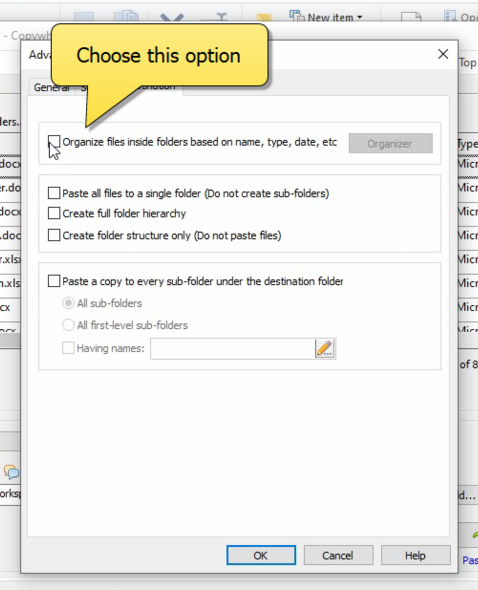
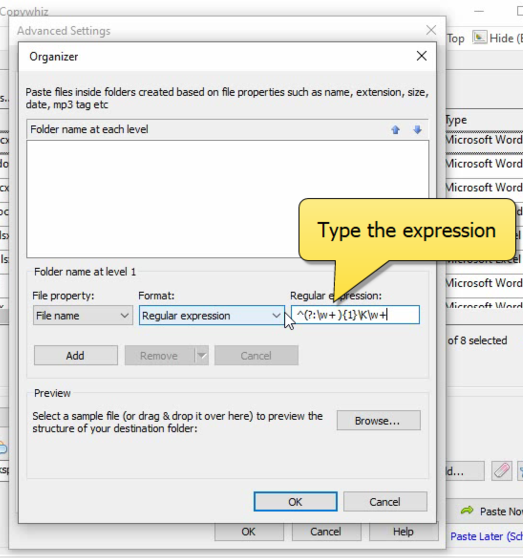
- Automatically organize files based on file attributes and metadata
- Copy files to multiple folders/computers
- Copy files from multiple folders and paste them at once
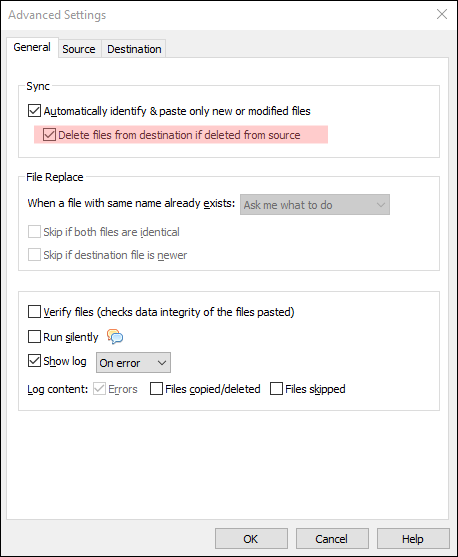
- Sync files between source and destination
- Pick files from multiple folders and compress in single .zip file
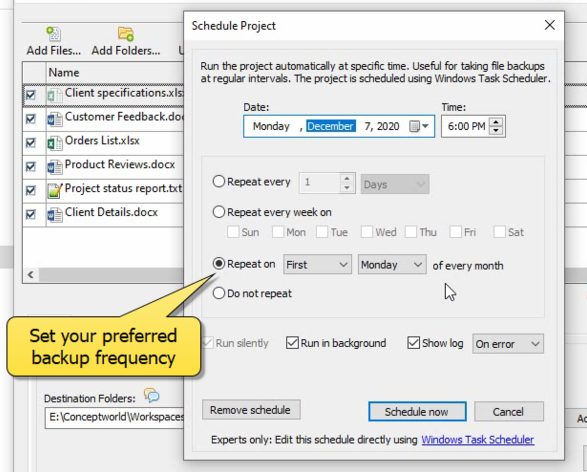
- Schedule file backups
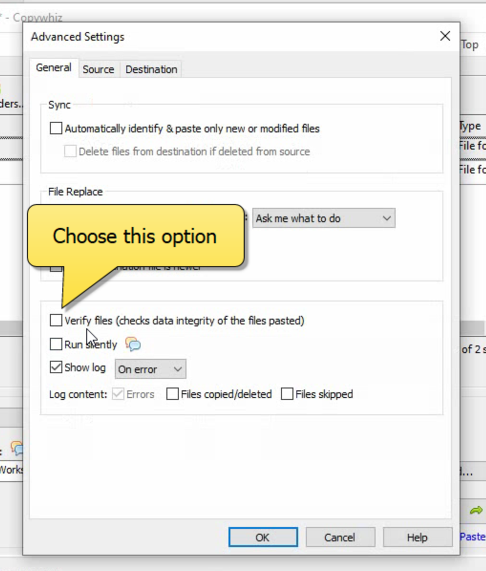
- Verify copied files for data integrity
- Retain security attributes of files & folders (ownership/user access)
- Several more hidden nuggets designed to make your file-copy task easier.
Transcription:
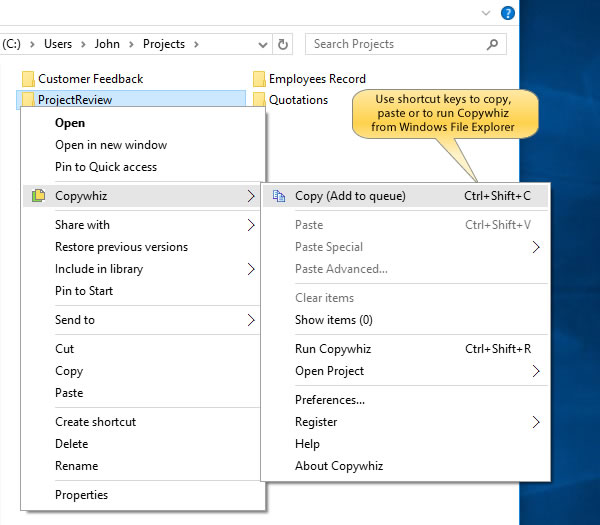
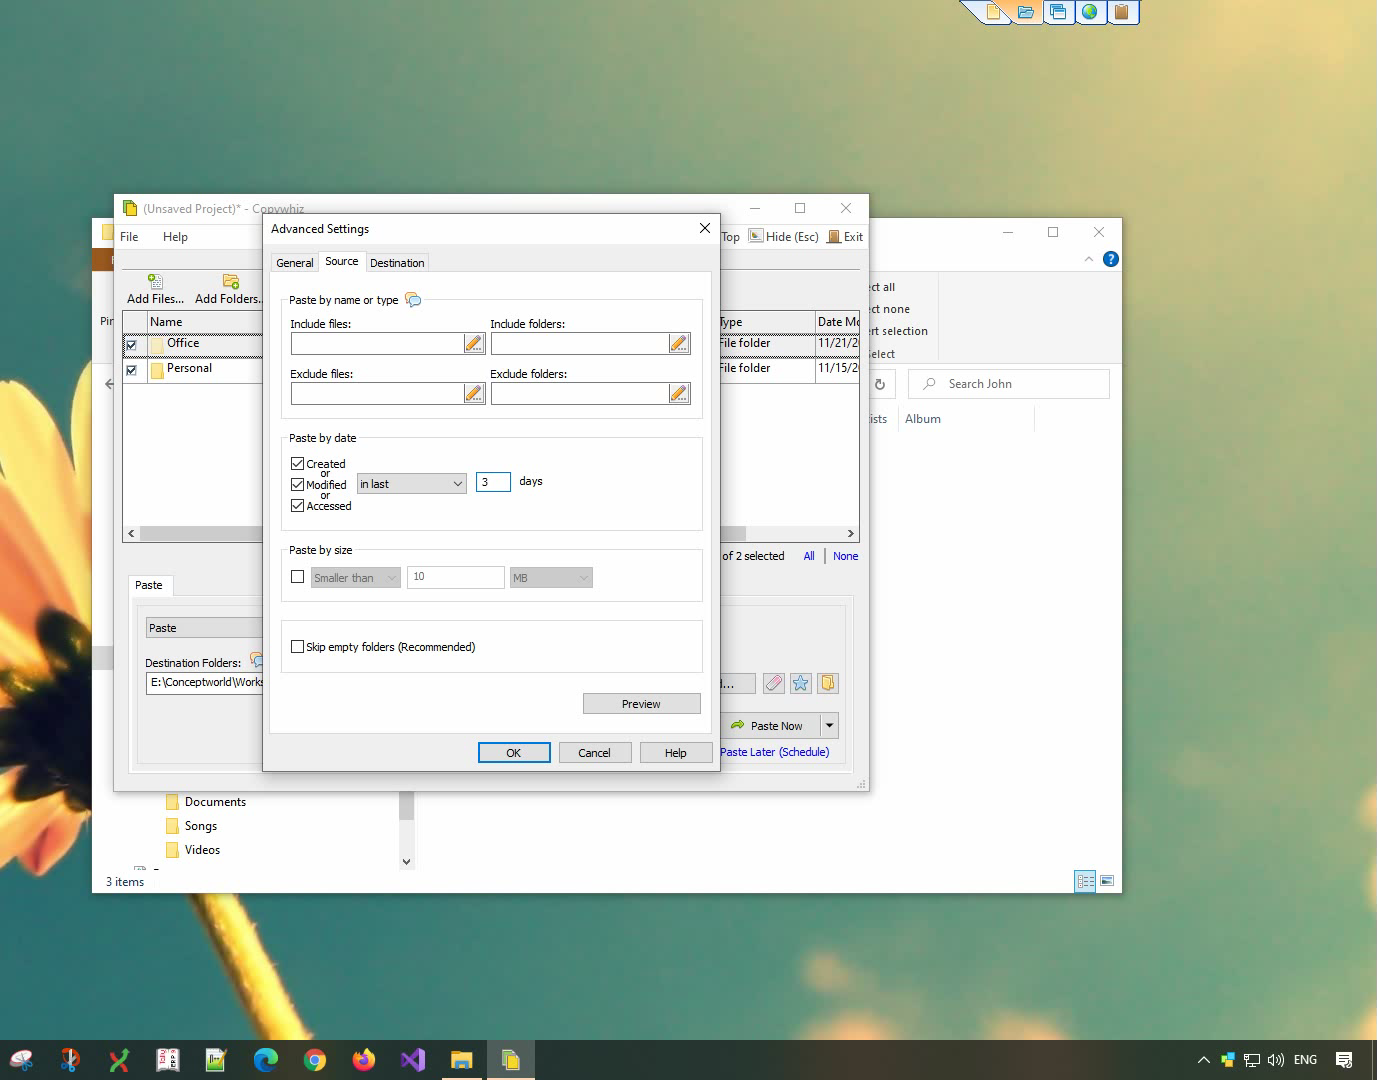
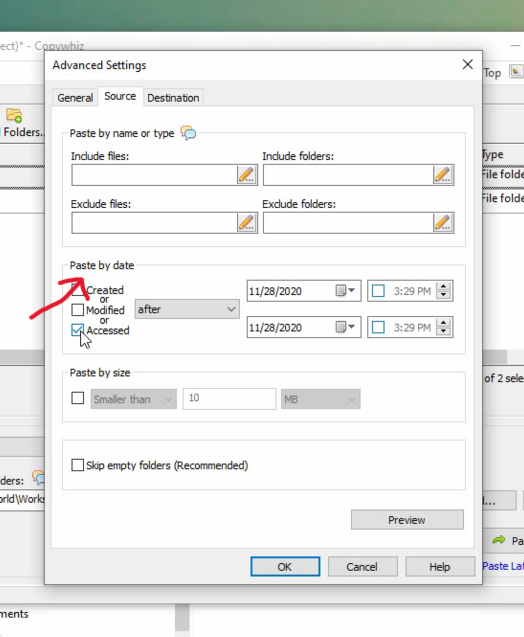
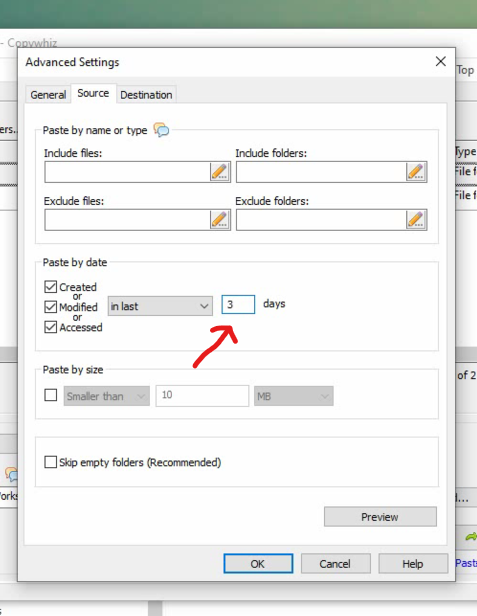
- Select files using Windows Explorer, right-click on them and choose Copywhiz->Copy from the menu.
- Repeat above step to copy files from different folders.
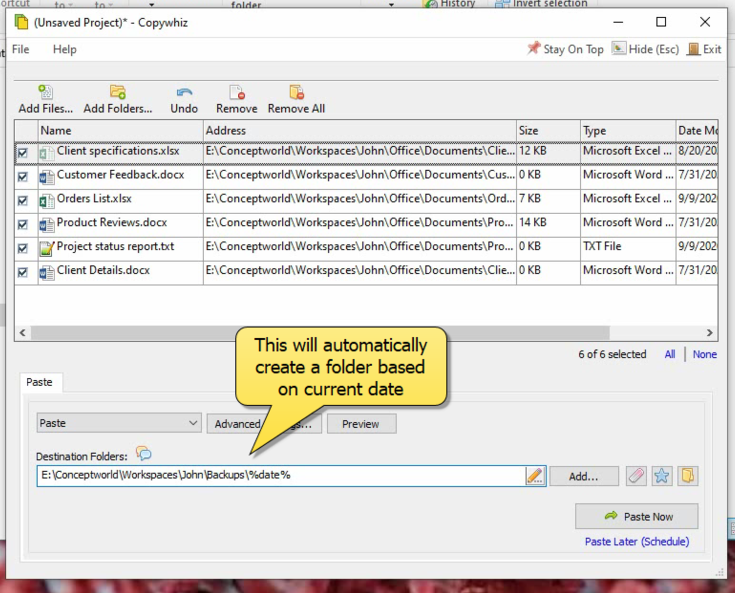
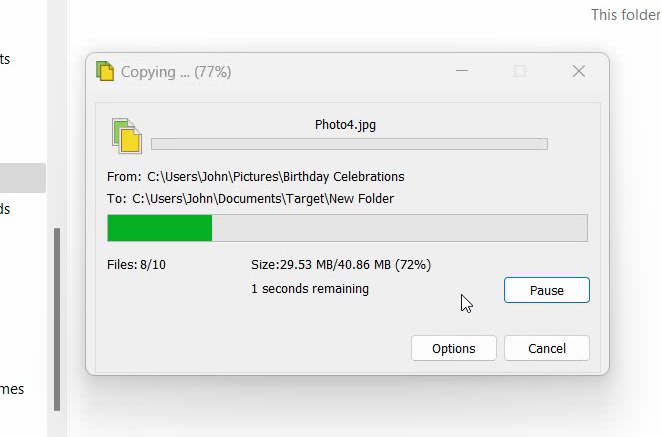
- Go to the destination folder, right-click inside the folder and select Copywhiz–>Paste. All the selected files from different folders will be copied successfully.
That’s it in this video.
Advantages of Using Copywhiz
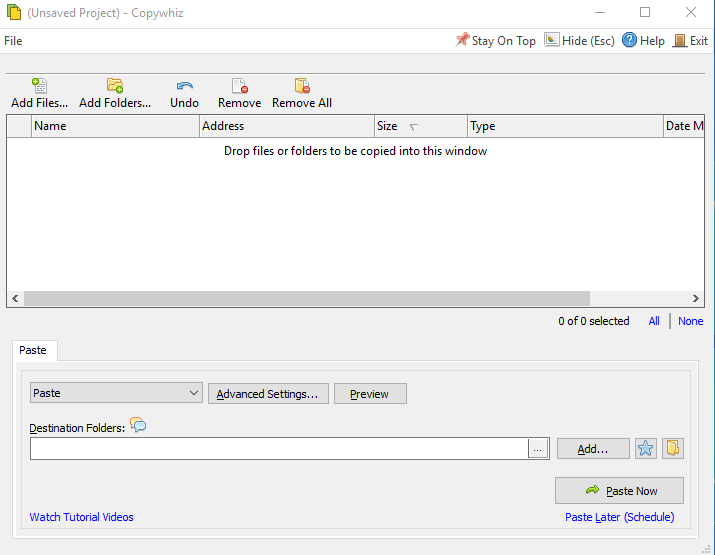
- User-Friendly Interface: The graphical interface makes it accessible even for non-technical users.
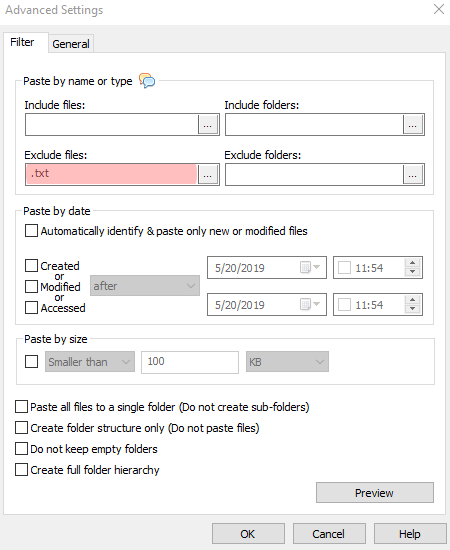
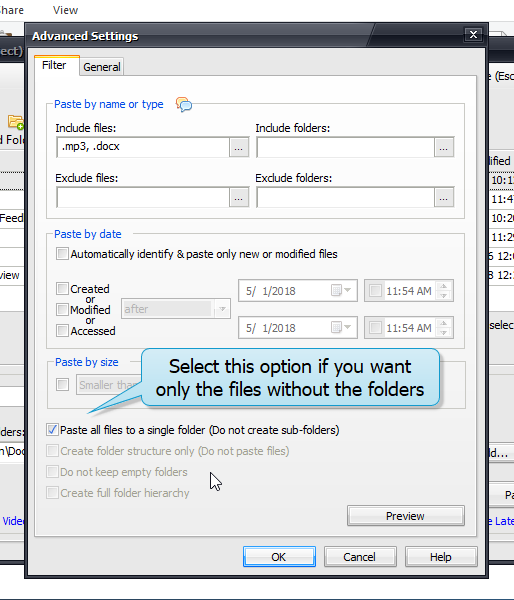
- Selective File Copying: Copywhiz allows you to exclude specific files or include only those that meet certain criteria.
- Batch Copying from Multiple Locations: Consolidate files from various folders in one seamless operation.
- Task Scheduling: Automate repetitive file copying tasks without requiring scripts or external tools.
- Error Handling: Handle duplicate files or conflicts with advanced options like renaming or skipping.
Let’s have a look on how we can use Xcopy:
Xcopy:
Xcopy is a command-line tool included in Windows. While it’s reliable for bulk file copying, it can be intimidating for non-technical users due to its text-based interface and cryptic command syntax. It also has limitations in handling complex scenarios, like selective copying based on specific criteria.
Using Xcopy
- Launch Command Prompt: Open the Command Prompt by typing
cmdin the Windows search bar and pressing Enter. - Prepare the Command: To copy files from multiple locations, you’ll need to manually specify each source folder. For example:
xcopy "C:\Source1\*" "C:\Destination\" /s /y xcopy "C:\Source2\*" "C:\Destination\" /s /y- Replace
C:\Source1\andC:\Source2\with your actual source paths. - Replace
C:\Destination\with your target folder path. - Options:
/s: Copies directories and subdirectories./y: Suppresses the confirmation prompt for overwriting files.
- Replace
- Execute the Command: Press Enter to execute the command for each source location.
- Verify the Result: Check the destination folder to ensure all files have been copied successfully.
Drawbacks:
- No graphical interface; requires precise syntax.
- Lacks advanced filtering or preview options.
Conclusion
While Xcopy is a robust tool for copying files, its command-line nature and limited flexibility make it less ideal for complex file management tasks. Copywhiz, on the other hand, provides an intuitive, feature-rich alternative that simplifies the process of consolidating files from multiple locations into a single folder. Whether you’re a casual user or a professional managing large data sets, Copywhiz is a must-have tool for your Windows toolbox.
Try Copywhiz today to experience effortless file copying!
Learn more about Copywhiz.
Download the free trial from here.
For more tutorial videos, click here .
Subscribe to our YouTube channel for regular updates and interesting videos!
Check out our other cool products.
Have a good day.
Thanks for reading till the end :)