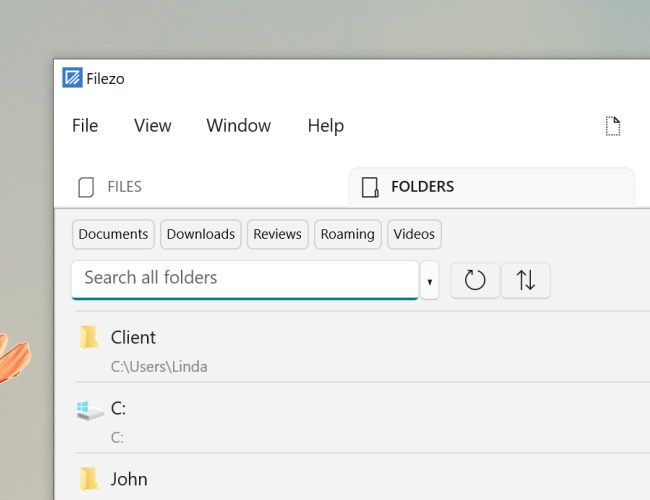
Just added a feature in Filezo! You can now pin frequently used files and folders on top of the search list.
Although Filezo! supports color coded tagging of files and folders, many customers requested for the ability to pin favorite files and folders for fastest access. We heard you!
The top row listing ‘Documents’, ‘Downloads’, ‘Reviews’ etc are pinned folders. Similarly you can pin files that you access often.
What is Filezo?
Filezo is a superfast launcher for Windows designed to make your computing life joyful. It gives you instant access to any of your files, folders and apps without the need to browse through hierarchical folders. Type and go! That’s it.
This article will tell you how to easily access files and folders by tagging them in Windows using Filezo and Everything by Voidtools. In short, Everything doesn’t support tagging.
Tagging files and folders be extremely useful. And sharing them with other users is even more beneficial to businesses and organizations. Filezo lets you do exactly this in Windows.
Tag files from Windows File Explorer or any of your favorite File Manager in Windows. Tagging files and folders helps you categorize them in order to access them quickly.
What is Filezo?
Filezo is a superfast launcher for Windows designed to make your computing life joyful. It gives you instant access to any of your files, folders and apps without the need to browse through hierarchical folders. Type and go! That’s it.
Add tags to files/folders using Windows file explorer
Add tags to files/folders using Filezo
Why tag files and folders?
We often find ourselves opening the same files and folders again and again for our work. Therefore easy and fast access to these files and folders is essential for work productivity. Setting up a tagging system is, therefore, a good idea.
A tag is generally a keyword or a term that you assign to a piece of information like your files, folders, images, etc. This helps you easily organize your files and folders and helps you avoid multi-folder navigation, especially when your folder structure is so complex that it takes a lot of time to find files.
Everything (Voidtools)
Tagging is not supported in Everything. Everything has a “Filters” feature. Using this, you can separate items based on their type like document, folder, video, audio, pictures, etc. and only view files of a particular type according to the selected filter.
Filtering is not same as tagging.
Tag files and folders and share those tags with other users using Filezo
Watch a short video perfectly depicting this feature:
Transcription of the above video:
Open the ‘Files’ tab in Filezo.
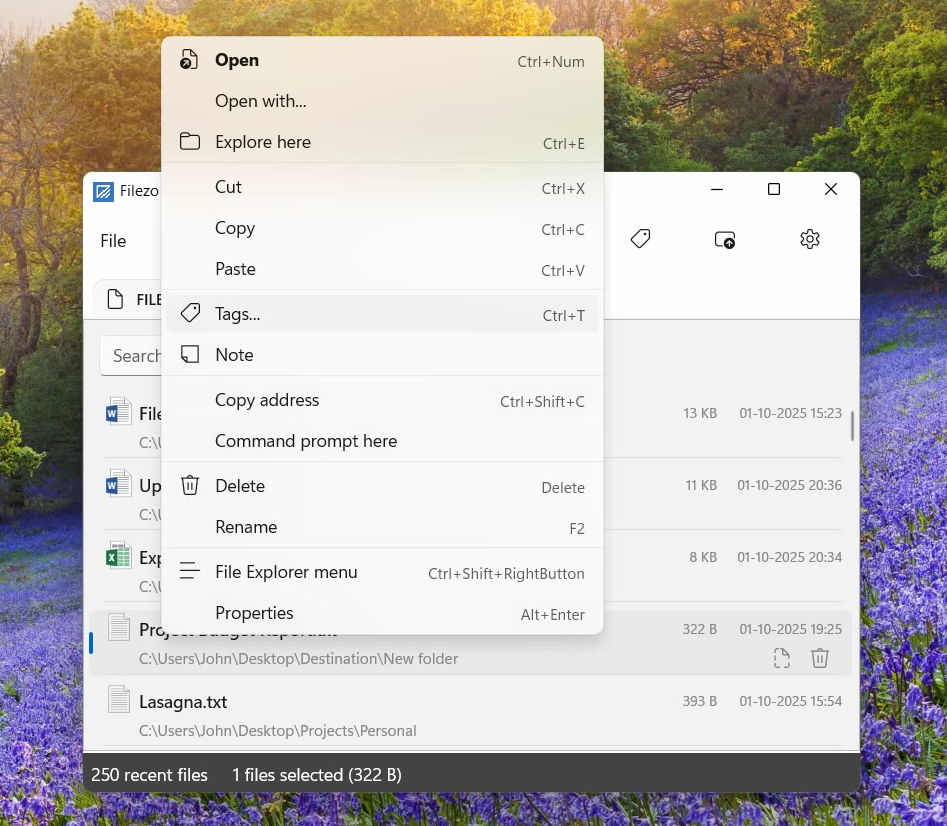
Right click on a file and select the Tags option from the menu.
We can assign multiple tags using comma as shown in the video.
Let’s try another way of creating a tag.
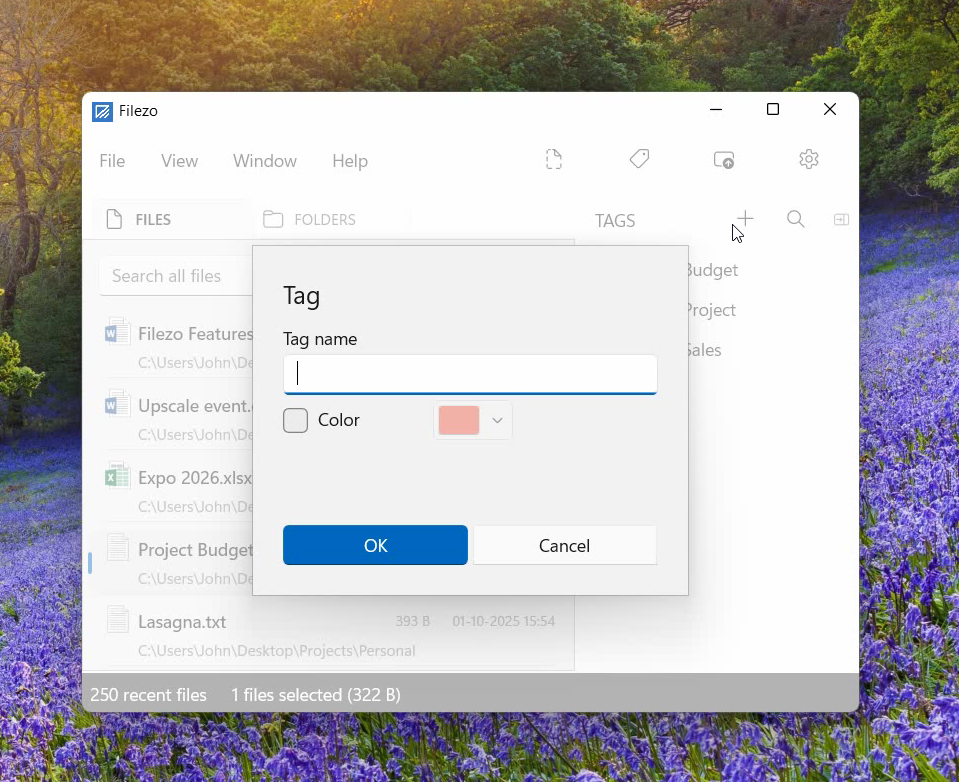
Go to the Tags pane and add a new tag.
Choose your preferred tag color.
Now drag and drop the tag on the file.
Right click on the tag for more options like edit or delete.
Let’s open the ‘Folders’ tab now.
Drag and drop the Marketing tag on the folder.
Just double click on the tag to view the tagged folders.
Another way is to type # in the search box and select the tag from the tags list.
Tag files and folders from Windows File Explorer/Manager using Filezo:
Watch a short video perfectly depicting this feature:
Transcription of the above video:
Open Windows File Explorer.
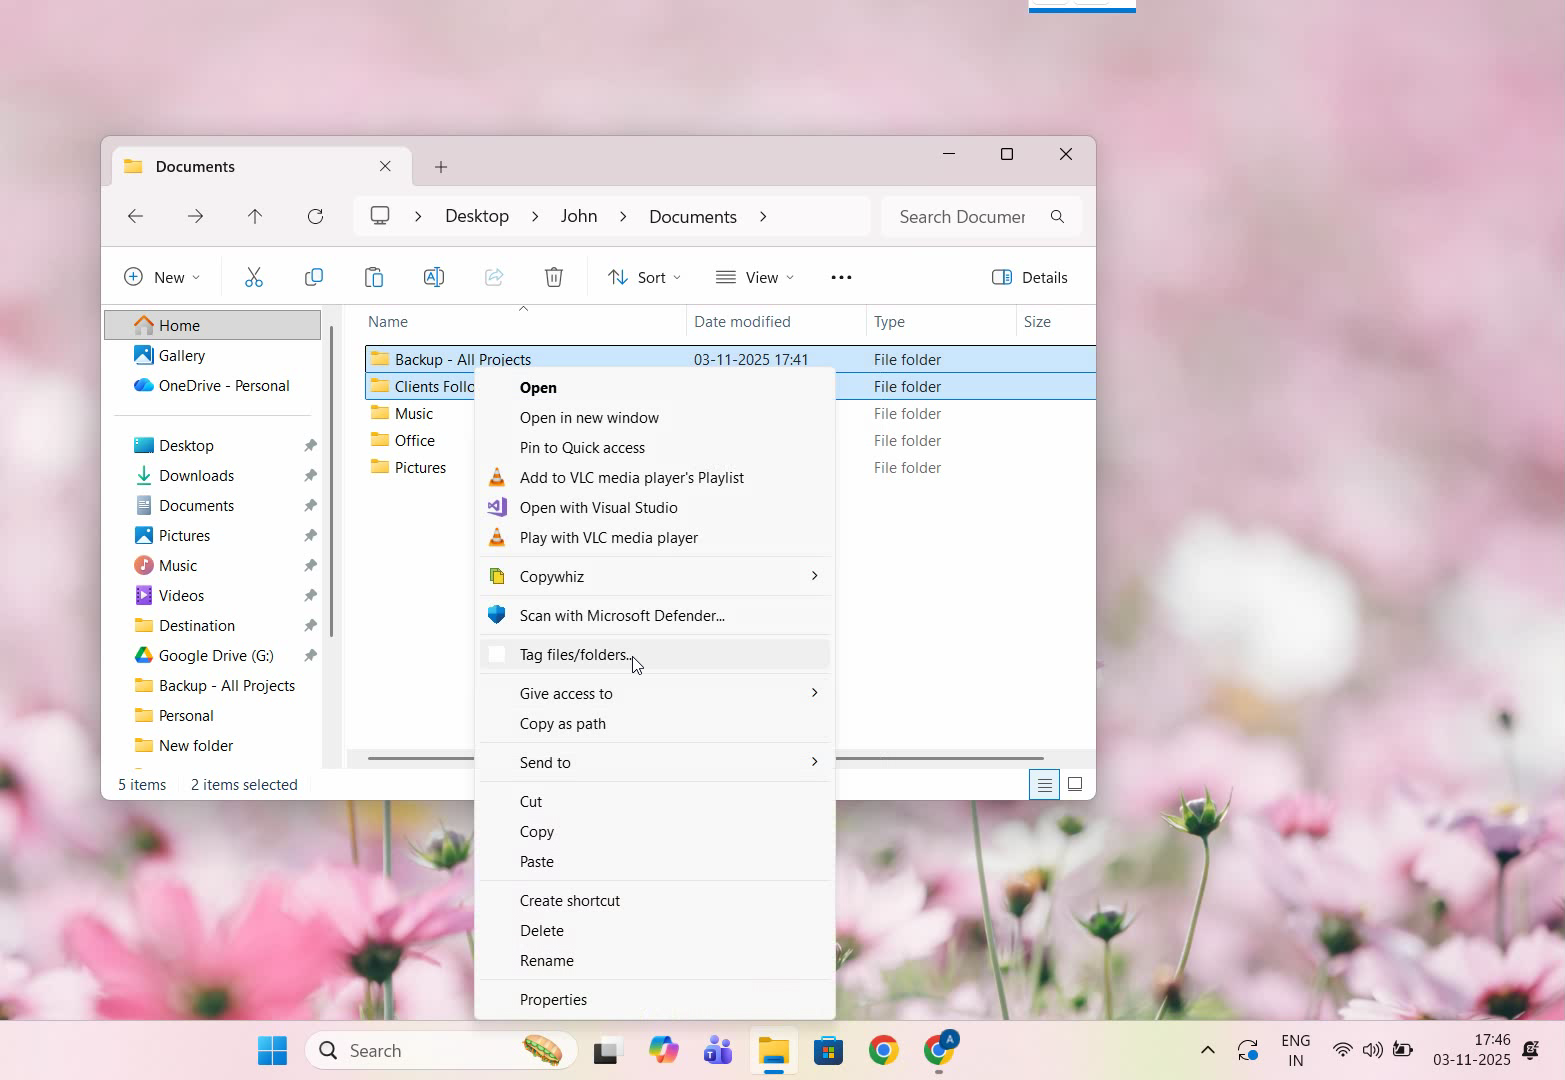
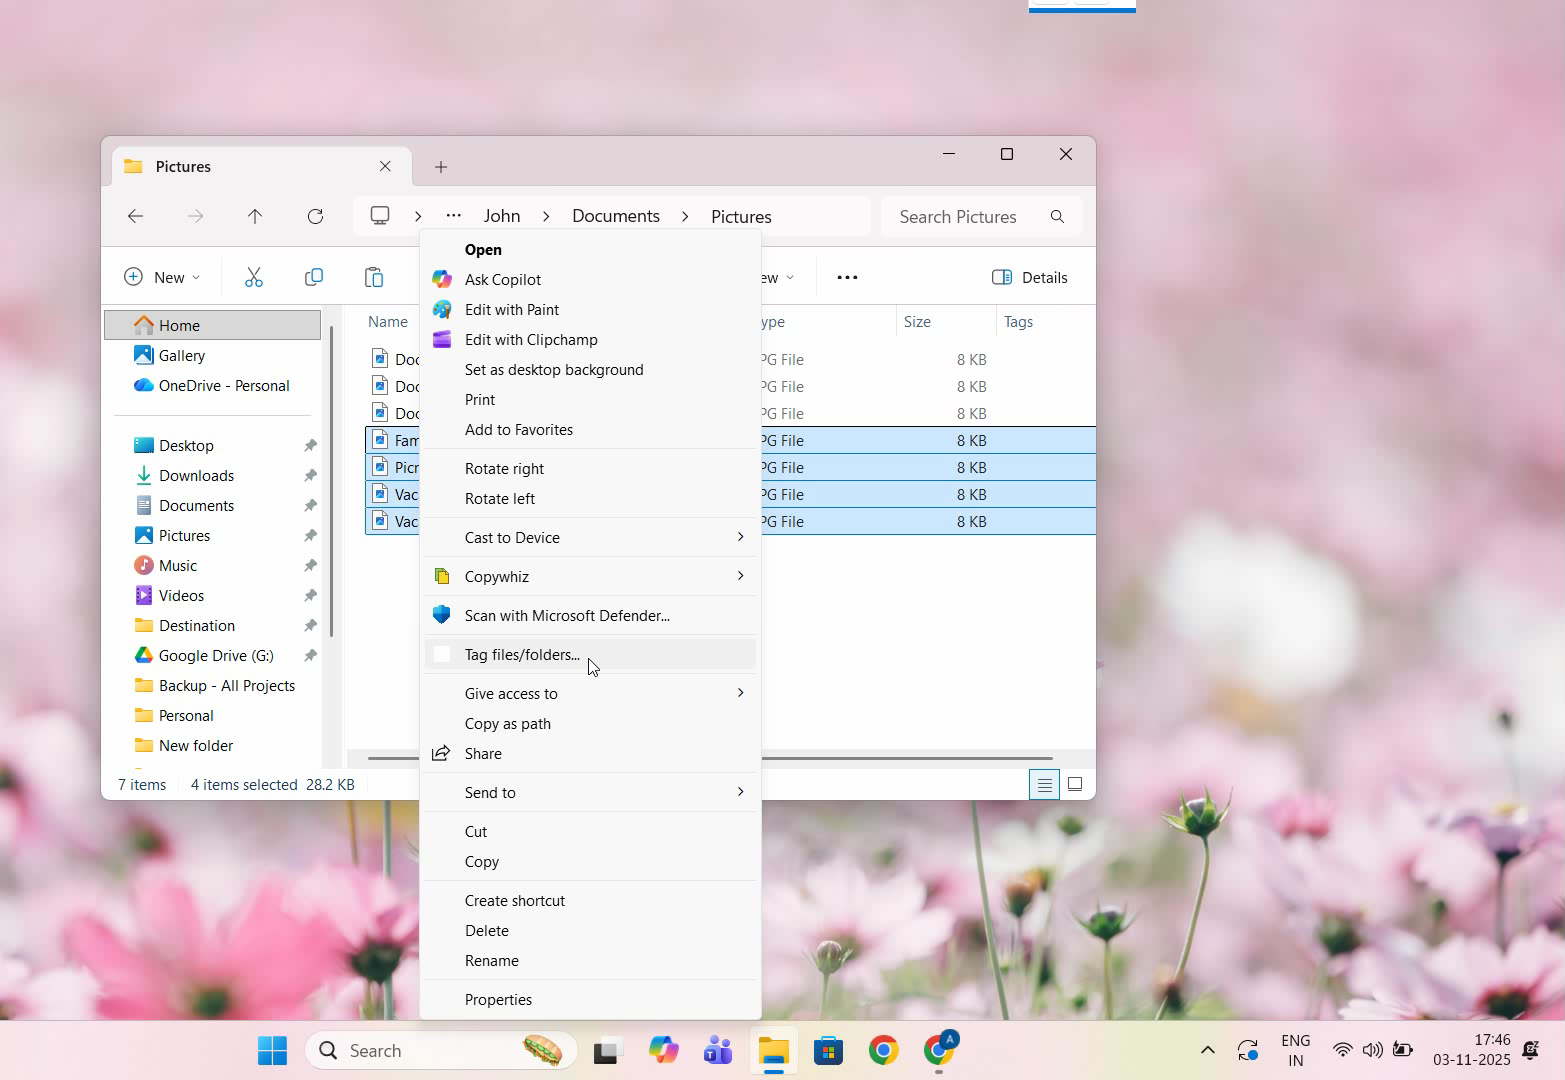
As shown in the video, we will add tags to files first. Select the files and right click and choose “Show more options”.
Click on Tag files and folders.
We have created a new tag called “Vacation”
To check, open the Tags pane in Filezo and double click on the tag. And there are the tagged files.
Now to tag folders, right click on the folders to select them.
Choose tag files and folders.
Now we will create a new tag called “Projects”.
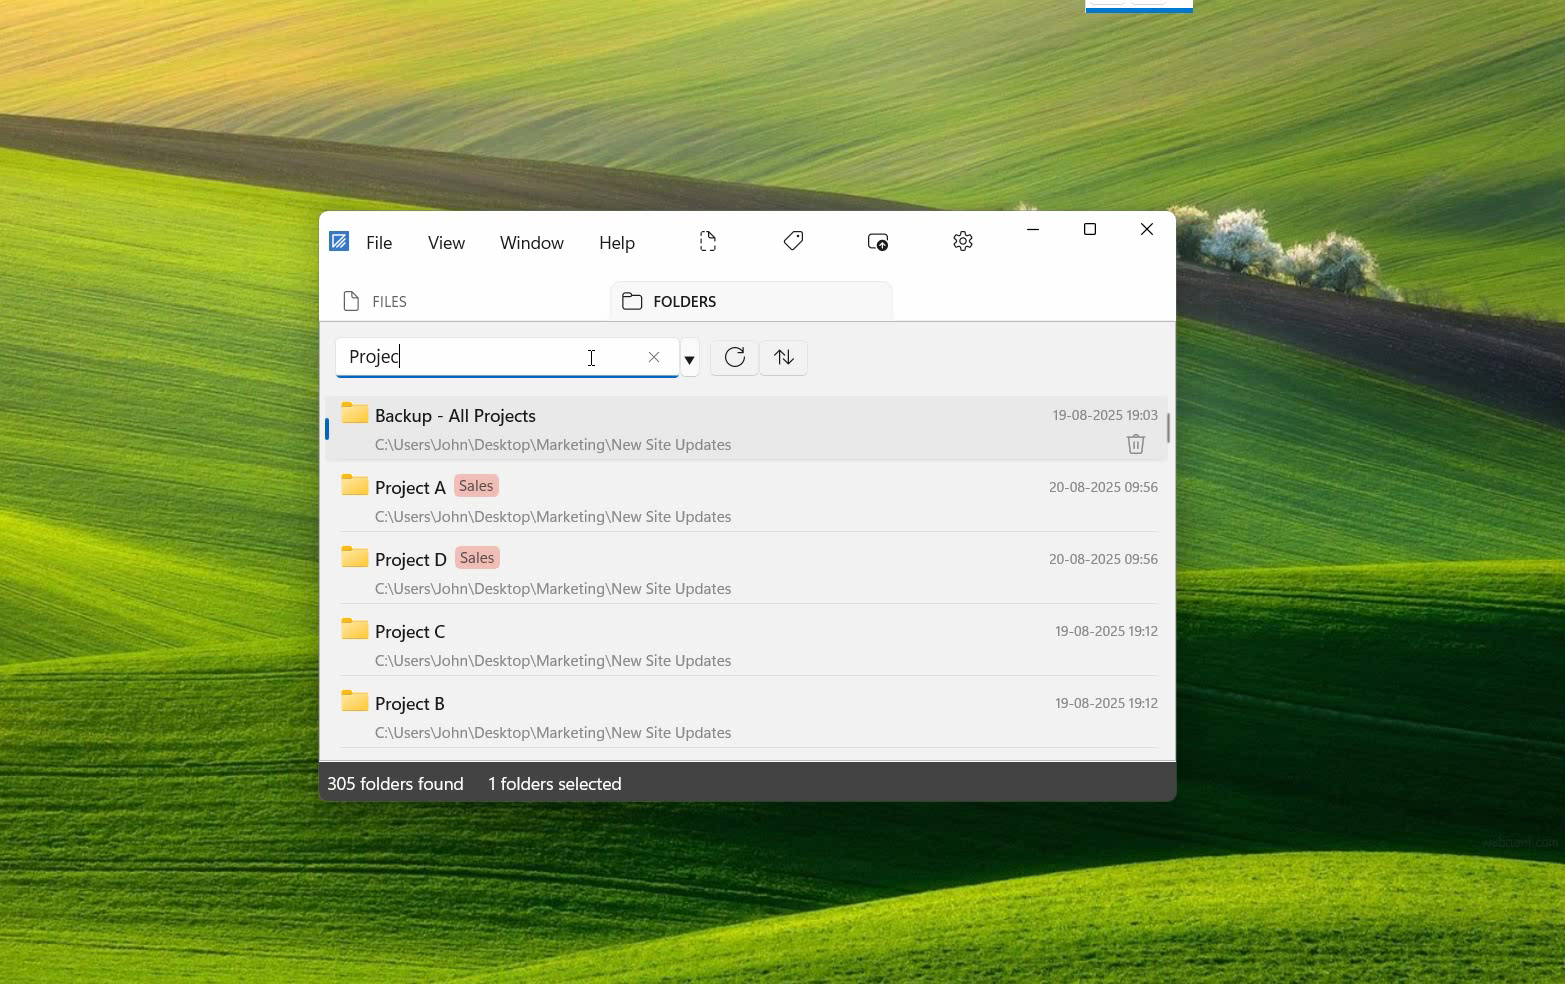
In Filezo, select the folders tab and in search bar type hash. All the tags created will be listed.
We will select Projects tag from here. And the folders will be listed.
We can also tag files and folders from within Filezo. One way is to right click on a folder or files and select Tags.
You can just drag and drop the tag over the folder or files. So simple!!
Filezo therefore comes very handy if you access the same set of folders each day for a particular project. Not only is this fast but also easy and fun. This feature is rarely available in any other file launching program.
Learn more about how Filezo can increase your work productivity from here.
Tagging items is a great option to organize your content. The same goes for the files and folders in your system as well.
Most of us don’t tag our files and folders in Windows since either we don’t know how to or it is a complicated procedure for us. This is not the case with Filezo. Tagging files, folders or apps is smooth using Filezo.
We have another good news for you. Filezo now supports tagging of files and folders directly from Windows File Explorer.
What is Filezo?
Filezo is a superfast launcher for Windows designed to make your computing life joyful. It gives you instant access to any of your files, folders and apps without the need to browse through hierarchical folders. Type and go! That’s it.
With Filezo, you can tag your files and folders directly from the app or from Windows File Explorer.
Here’s a short video depicting this feature:
These are the steps to tag files and folders directly from Windows file explorer, using Filezo:
Open Windows File Explorer.
As shown in the video, we will add tags to files first. Select the files and right click and choose “Show more options”.
Click on Tag files and folders.
We have created a new tag called “Vacation”
To check, open the Tags pane in Filezo and double click on the tag. And there are the tagged files.
Now to tag folders, right click on the folders to select them.
Choose tag files and folders.
Now we will create a new tag called “Projects”.
In Filezo, select the folders tab and in search bar type hash. All the tags created will be listed.
We will select Projects tag from here. And the folders will be listed.
We can also tag files and folders from within Filezo. One way is to right click on a folder or files and select Tags.
You can just drag and drop the tag over the folder or files. So simple!!
An easier way to tag files and folders is to drag and drop it from within Filezo. Taggged files and folders can be shared with other users over the network. They just have to install Filezo and index the same shared folders. That’s it! They will have instant access to the same tags.
Why Filezo?
You now have seen how easy it is to assign tags using Filezo. Unlike Windows, the procedure is much simpler.
Another limitation that Windows has is that it only permits tagging of images, videos, and documents. You might not see the tagging option even on supported file types on rare occasions, depending on the file format.
Also, if you use a different file system, or transfer or shift your files to other computers or external hard drives and thumb drives, then the tags do not stay. Tagging of folders is also not supported in Windows.
All these factors make Filezo a good alternative to Windows File Explorer when you want to tag files and folders.
Another cool thing about Filezo is that it allows searching by multiple tags also. Hold the Ctrl key and select the second tag button from the toolbar in Filezo. You will see the second tag being added automatically.
Thanks to Lee Garber for his excellent review on Filezo
A must have document, folders and app launcher! I have heard much about Filezo and decided to try it. It’s truly a great and time saving program.
Filezo is a fast file launcher. It allows you to open recently used documents, media, folders and apps in a flash. But why use it you ask? Why not open these files and folders manually? The answer is the fortune of time and aggravation you will save using Filezo and the refreshing convenience that comes from use of well designed program.
Filezo puts all your recently used documents, media and folders in an easy accessible and searchable hotkey triggered list for super fast identification and access. The most recently used files, folders and programs get priority.
Want to keep working on a Microsoft Word document you were editing yesterday, last week, last month, and know its name but forgot where you saved it in your tree file structure? Call up Filezo with CTRL+SHIFT+1 and your recently used documents list will be in front of you, type a bit of the file name you are after and in a flash and your document is there, and you can open it and work on it with a minimum of fuss. All I can say is wow! Increased productivity here I come! Also hotkeys are configurable.
The program can also be accessed from the system tray or from clicking on a floating tab panel. Best of all it is not complicated and it is user friendly and intuitive. Microsoft why don’t you design software like this?
Better still you can easily configure it to open folders in any file manager of your choice. You can drag your recently used files right out of Filezo as attachments into e-mail – which is just awesome – it is worth buying for this alone. Filezo even allows you to cut recently used files from your recent files list and you can them paste them to locations of your choice within the folder list of Filezo itself!
You can also list all matching items in searches you conduct so your searches are not limited to recent documents, media, folders and apps only. Also the Windows explorer menu is also accessible while in Filezo
In short Filezo is a wonderful, well thought out application that will save you a fortune of time, aggravation and money once you use it and you will soon wonder how you ever got by without it.
I strongly recommend you purchase a copy. It will pay for itself in no time!
What is Filezo?
Filezo is a superfast launcher for Windows designed to make your computing life joyful. It gives you instant access to any of your files, folders and apps without the need to browse through hierarchical folders. Type and go! That’s it.
As shown in the video, open the Files tab in Filezo.
Let’s look up a file. Type the keyword and instantly get your document wherever it is on your system.
To open any document, simply double-click it or press the Ctrl key and the number shown next to the file name.
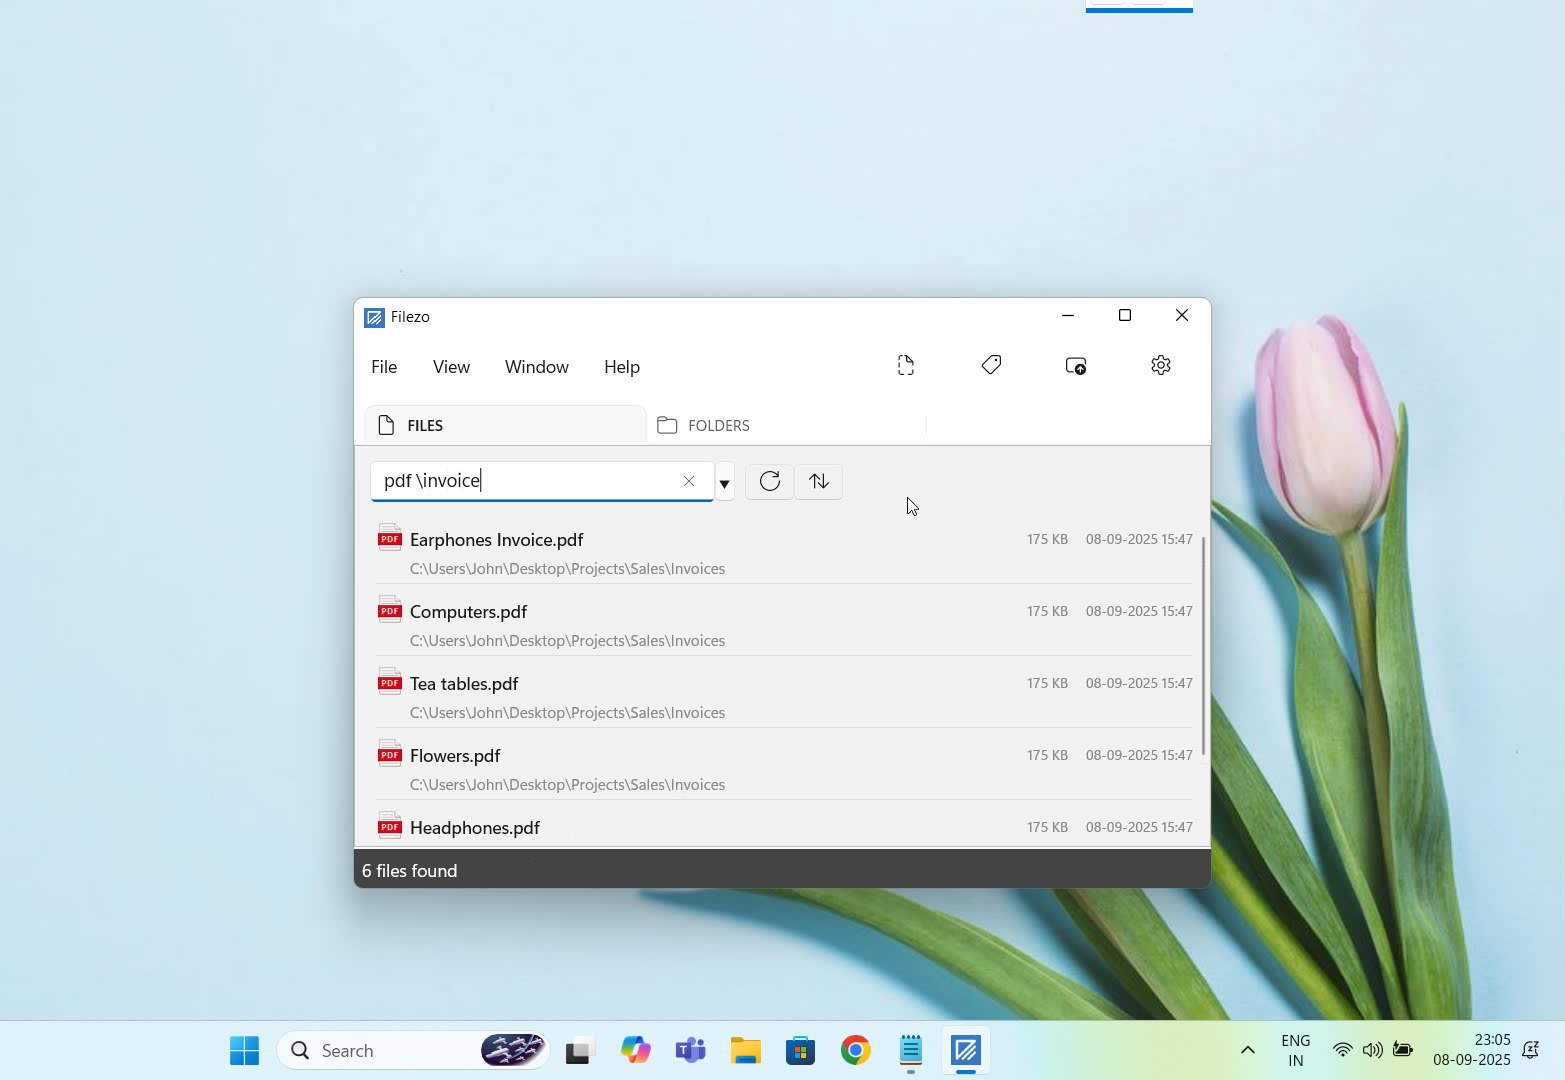
Now let’s look for another file inside a specific folder.
Use the backslash prefix to search inside a specific folder. And the files are here.
You can also save your favorite keywords to access the same results in just 2 clicks.
Filezo supports advanced search options as shown in the video.
To organize we will drag a tag from the tags pane and drop it onto the file, as you can see in the video.
Filezo also allows us to show a quick preview of any file. It supports several file types including audio and video.
Filezo can annotate any file or folder, just right-click and select ‘Note’.
Type additional comment to the file for your reference without actually modifying the file. This can be really useful.
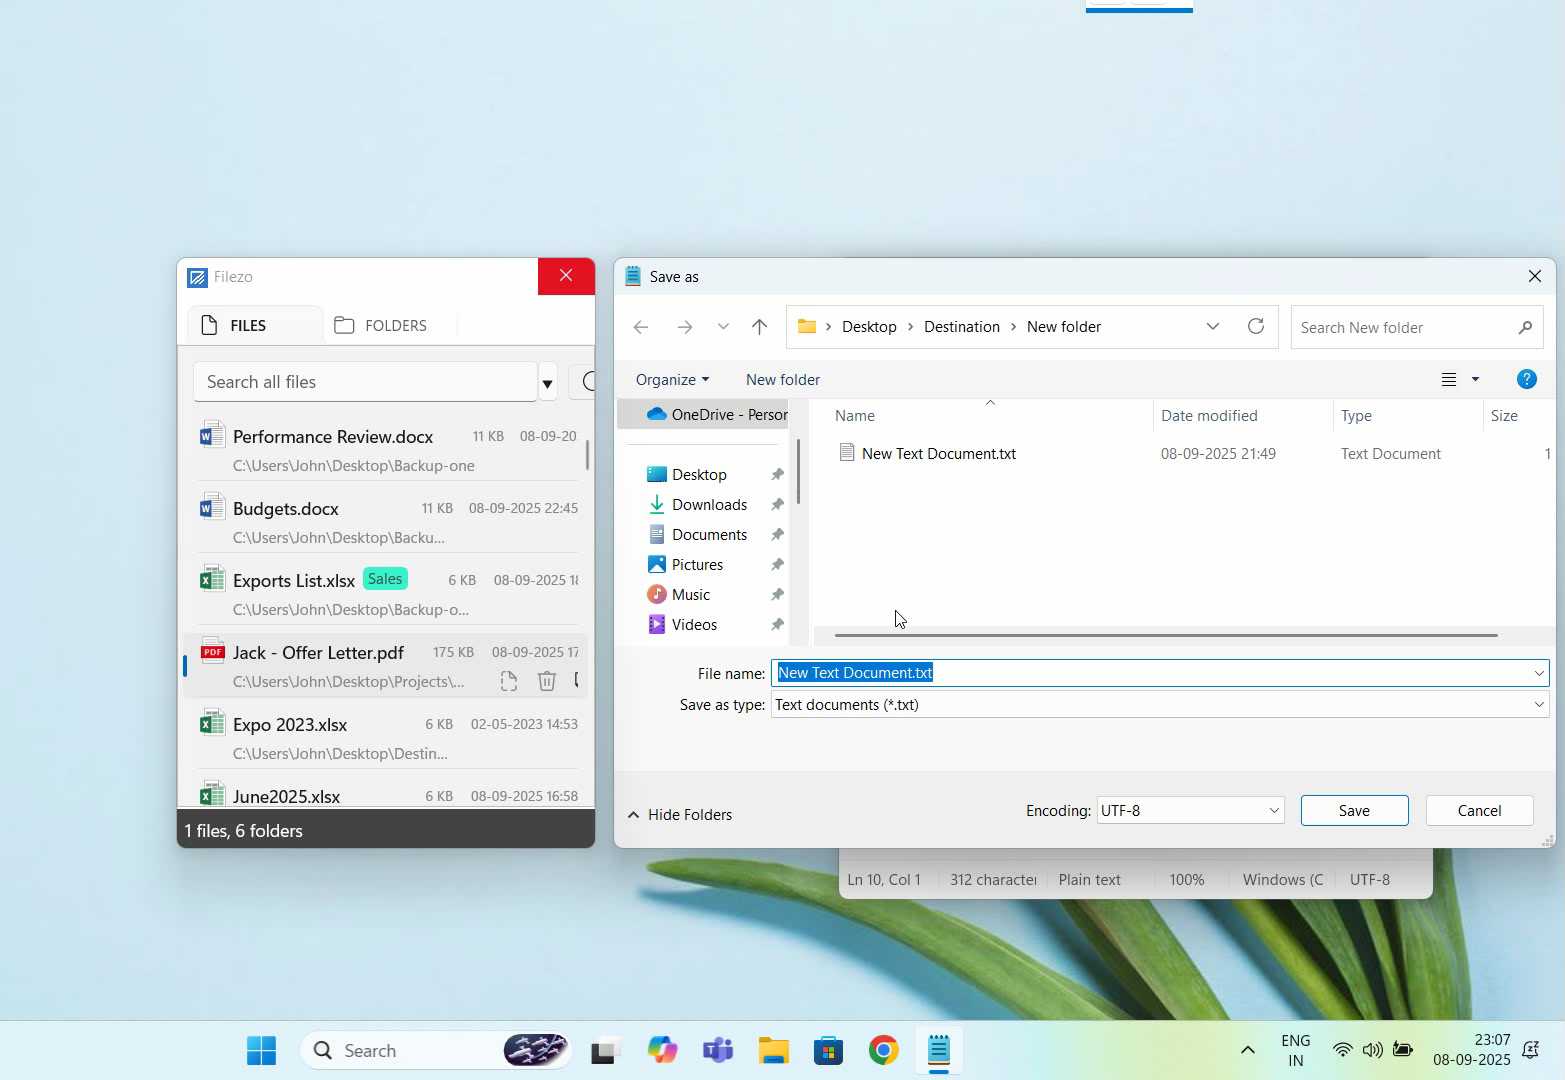
Let’s open Notepad and click on File Open from the menu.
As you could see, Filezo automatically integrates with every file open save window on your system. You can select an existing file or jump to any folder any deep, directly using Filezo.
A cool feature is that you can tag your folders. You can also assign multiple tags to a single folder. Taggged and annotated files can be shared with other users over the network. They just have to install Filezo and index the same shared folders. That’s it.
Filezo automatically tracks files & folders opened using Windows Start Menu, Windows Explorer and most other programs. However, it is unable to track files opened using Total Commander.
What is Filezo?
Filezo is a superfast launcher for Windows designed to make your computing life joyful. It gives you instant access to any of your files, folders and apps without the need to browse through hierarchical folders. Type and go! That’s it.
Basically, you would need to set an AutoHotkey script to run in Total Commander whenever a file/folder is opened from it.
Filezo monitors all items added to the Windows Recent Documents list. This is nothing but the “\Microsoft\Windows\Recent” folder under AppData. If you open %appdata%\Microsoft\Windows\Recent from Windows start menu, you will get to the exact folder.
To make any file type (e.g. “*.pdf”) that you want TC to create shortcuts for in the Windows ‘Recent’ folder run this script, use menu: “Files|Internal Associations” and add the file type. In the input box next to “Open”, put:
"[PathAndFullNameOfAHKScript]" "%1"
That’s it.
Filezo automatically remembers our favorite folders. It also supports hierarchical and color-coded tags. Accessing a folder any level deep, is insanely fast in Filezo.
We all like speed. But it gets annoying when simple tasks like searching for a file or folder on our system take a lot of time and effort out of our important tasks.
This article will tell you how to search for files and folders faster in Windows using Filezo and how it can be used as an alternative to Everything by Voidtools.
What is Filezo?
Filezo is a superfast launcher for Windows designed to make your computing life joyful. It gives you instant access to any of your files, folders and apps without the need to browse through hierarchical folders. Type and go! That’s it.
Searching using Filezo compared to Everything (Voidtools)
Searching for files: Filezo separates items on the basis of Files, Folders, Programs, Websites and clipboard. This way, the items are not mixed up with each other. This also narrows down the result list since you no longer have to search among unrelated items for the item you want.
Everything, on the other hand, does not separate files and folders and lists down every object in your system initially. There is a filter to only show objects of a particular type, which you can choose to separate these items.
Watch a short video on this feature of Filezo:
Transcription of the above video:
Open the ‘Folders’ tab in Filezo.
Type your keyword in the search box.
Double click on the folder and that’s it.
Let’s see how to tag folders in Filezo.
Select a folder from the list and right click.
Click on the ‘Tags’ option and assign the tag.
Let’s go to the tags pane and edit the tag.
Right click on the Tag and select the Edit option.
We can change the tag color for quick identification.
There are some key functions to manage the folders.
Choose Explorer here to open the containing folder.
We can add a comment to any folder using Note option.
We can directly open the Windows File Explorer menu from Filezo.
Filezo helps you avoid full folder structure navigation to access subfolders. As mentioned earlier, it separates files and folders. So now, when you want to search for a particular folder, go to the “Folders” Tab of Filezo and type in your search keyword in the text box given below. It will find an item in less than 3 seconds, no matter how deep they are located in your system. Double-click on the desired folder to open it immediately.
Everything has a folder filter. Using this filter, every folder on your system is listed down, and you then have to type the folder you are searching for. The indexing and search offered by Everything is speedy.
Note: With Filezo, you can even add tags to your files and folders for easy access later on. Tagging feature doesn’t exist in Everything.
Everything, on the other hand, has the option to sort items based on Dated Accessed, modified, etc. But sorting the items based on it is really slow, and the long list of items still remains, only that they are now in a different order which doesn’t make much of a difference.
Filezo therefore proves an efficient alternative to Everything. The plus point is that there is nothing to learn. It is effortless and also works out of the box. Just install and see it working.
This post will highlight the ways in which you can work with files and folders easily in Windows by comparing the functions of Everything by Voidtools and an alternative, Filezo.
What is Filezo?
Filezo is a superfast launcher for Windows designed to make your computing life joyful. It gives you instant access to any of your files, folders and apps without the need to browse through hierarchical folders. Type and go! That’s it.
The file open/save dialog window that is shown by all Windows applications is very tedious to use. Filezo makes it very easy to select any file in this window. When the file open/save window opens, find & choose the file using Filezo. The file name will be automatically displayed in the File Open/Save window, after which you need to click on “Open.” That’s it.
Everything: This function is not available in Everything by Voidtools. You can easily copy or move an item from one place to another but not open or save them from within the program itself.
Quickly access files and folders by tagging them
Filezo lets you tag any file or folder in Windows. Tagging files help you to access a group of files/folders etc. in a few seconds, however deep they are in your system. This feature can save a lot of time. You can also send standard email replies to your clients by tagging clipboard items.
Everything: It does not have a tagging feature, but it does have a filter feature to sort items according to their type.
Tip: To find and launch a website faster, you can even create and use tags.
Everything: With this, you can add a list of files as a bookmark to access the same files easily for future use. However, you cannot search or access website history from browsers.
This short video will give you more clarity on this:
Transcription of the above video:
As shown in the video, open the Files tab in Filezo.
Let’s look up a file. Type the keyword and instantly get your document wherever it is on your system.
To open any document, simply double-click it or press the Ctrl key and the number shown next to the file name.
Now let’s look for another file inside a specific folder.
Use the backslash prefix to search inside a specific folder. And the files are here.
You can also save your favorite keywords to access the same results in just 2 clicks.
Filezo supports advanced search options as shown in the video.
To organize we will drag a tag from the tags pane and drop it onto the file, as you can see in the video.
Filezo also allows us to show a quick preview of any file. It supports several file types including audio and video.
Filezo can annotate any file or folder, just right-click and select ‘Note’.
Type additional comment to the file for your reference without actually modifying the file. This can be really useful.
Let’s open Notepad and click on File Open from the menu.
As you could see, Filezo automatically integrates with every file open save window on your system. You can select an existing file or jump to any folder any deep, directly using Filezo.
Everything: This function is not available in Everything.
Thus Filezo proves very efficient, productive and easy at the same time.
Hey Guys! Searching files inside a specific folder using Filezo is extremely efficient because it focuses only on the location you choose, avoiding a full-system scan. This targeted search helps you get results much faster, especially when dealing with large drives or complex directory structures.
With Filezo, you can quickly find files contained inside specific folders in Windows. This is otherwise quite difficult using the Windows Search. We will show you how to do this using Filezo.
Accessing a folder using the traditional way takes a lot of time! You need to go through the long folder hierarchy each and every time. But with filezo we can save a lot of time. It also remembers your favorite files and folders for faster easier launch.
What is Filezo?
Filezo is a superfast launcher for Windows designed to make your computing life joyful. It gives you instant access to any of your files, folders and apps without the need to browse through hierarchical folders. Type and go! That’s it.
Finding files inside particular folder using Filezo.
Here’s a short video about this feature:
Transcription of the above video:
As shown in the video, open the Files tab in Filezo.
Let’s look up a file. Type the keyword and instantly get your document wherever it is on your system.
To open any document, simply double-click it or press the Ctrl key and the number shown next to the file name.
Now let’s look for another file inside a specific folder.
Use the backslash prefix to search inside a specific folder. And the files are here.
You can also save your favorite keywords to access the same results in just 2 clicks.
Filezo supports advanced search options as shown in the video.
To organize we will drag a tag from the tags pane and drop it onto the file, as you can see in the video.
Filezo also allows us to show a quick preview of any file. It supports several file types including audio and video.
Filezo can annotate any file or folder, just right-click and select ‘Note’.
Type additional comment to the file for your reference without actually modifying the file. This can be really useful.
Let’s open Notepad and click on File Open from the menu.
As you could see, Filezo automatically integrates with every file open save window on your system. You can select an existing file or jump to any folder any deep, directly using Filezo.
Filezo supports hierarchical and color-coded tags. A cool feature is that you can tag your folders. You can also assign multiple tags to a single folder. Taggged and annotated files can be shared with other users over the network. They just have to install Filezo and index the same shared folders. That’s it.
We have hundreds of folders in our systems. And it gets really hectic to look for specific files lost somewhere in the lot.
Tagging folders is therefore what i would suggest. Just like how you tag files, tagging folders will help you stay organized and makes things more accessible.
In our previous post, we gave steps on how to tag files directly from Windows File explorer, using Filezo, and why it is better than Windows.
Windows offers the ability to tag files. But it only permits tagging of images, videos, and documents. You cannot tag any other type of file in Windows. Plus Windows doesn’t let you tag a folder.
This post will show you how you can tag folders in Windows using the Windows File Explorer and an alternative software, Filezo. Filezo lets you tag any file or folder. This is the most important difference between Filezo and Windows tagging system.
This post will tell you how to tag folders directly from File Explorer using Filezo. You will be able tag even files in the same way.
What is Filezo?
Filezo is a superfast launcher for Windows designed to make your computing life joyful. It gives you instant access to any of your files, folders and apps without the need to browse through hierarchical folders. Type and go! That’s it.
Tagging files and folders using Windows File Explorer
Sadly, Windows does not have a direct way to tag folders. You have to use third party apps to do that.
But don’t worry. Filezo has you covered.
Tagging folders from Windows File Explorer using Filezo
Here’s a short video about this feature:
These are the steps to tag files and folders directly from Windows file explorer, using Filezo:
Open Windows File Explorer.
As shown in the video, we will add tags to files first. Select the files and right click and choose “Show more options”.
Click on Tag files and folders.
We have created a new tag called “Vacation”
To check, open the Tags pane in Filezo and double click on the tag. And there are the tagged files.
Now to tag folders, right click on the folders to select them.
Choose tag files and folders.
Now we will create a new tag called “Projects”.
In Filezo, select the folders tab and in search bar type hash. All the tags created will be listed.
We will select Projects tag from here. And the folders will be listed.
We can also tag files and folders from within Filezo. One way is to right click on a folder or files and select Tags.
You can just drag and drop the tag over the folder or files. So simple!!
Conclusion
Tagging things with Filezo is fast and easy. All your items can be accessed quickly.
You can do a lot more with Filezo. It has amazing features you should definitely try.
Another cool thing about Filezo is that it allows searching by multiple tags also. Hold the Ctrl key and select the second tag button from the toolbar in Filezo. You will see the second tag being added automatically.
Tags or labels are very important when working with files. They help you stay organized and increase productivity by saving your time and effort on looking for things.
We know that Windows offers the ability to tag files. But it only permits tagging very limited type of documents. You cannot tag any file in Windows. Plus Windows doesn’t let you tag a folder.
This post will show you how you can tag files in Windows using the Windows File Explorer and an alternative software, Filezo. Filezo lets you tag any file or folder. This is the most important difference.
What is Filezo?
Filezo is a superfast launcher for Windows designed to make your computing life joyful. It gives you instant access to any of your files, folders and apps without the need to browse through hierarchical folders. Type and go! That’s it.
Tagging files and folders using Windows File Explorer
Transcription of the above video:
Open the ‘Files’ tab in Filezo.
Right click on a file and select the Tags option from the menu.
We can assign multiple tags using comma as shown in the video.
Let’s try another way of creating a tag.
Go to the Tags pane and add a new tag.
Choose your preferred tag color.
Now drag and drop the tag on the file.
Right click on the tag for more options like edit or delete.
Let’s open the ‘Folders’ tab now.
Drag and drop the Marketing tag on the folder.
Just double click on the tag to view the tagged folders.
Another way is to type # in the search box and select the tag from the tags list.
Our Verdict
Both Windows and Filezo have minimal steps to tag files.
However, there’s a twist here. Windows has a limitation so it only permits tagging of images, videos, and documents. You might not see the tagging option even on supported file types on rare occasions, depending on the file format.
Also, if you use a different file system, or transfer or shift your files to other computers or external hard drives and thumb drives, then the tags are removed.
Thereby, we would definitely go with something reliable like Filezo.
Another cool thing about Filezo is that it allows searching by multiple tags also. Hold the Ctrl key and select the second tag button from the toolbar in Filezo. You will see the second tag being added automatically.