We constantly work with multiple folders for our projects and it is difficult to keep a check on the modifications made in each folder.
What if our folders were automatically monitored and the files automatically organized on a timely basis? Copywhiz file copy and backup app can do that for you!
What is Copywhiz?
Copywhiz enhances your file-copy experience by letting you to have more flexibility & control over the file copying and backup process.
Here is how Copywhiz makes file copying a breeze:
- Copy only new or modified files
- Easily pick files by name, extension, folder etc from bunch of folders
- Automatically organize files based on file attributes and metadata
- Copy files to multiple folders/computers
- Copy files from multiple folders and paste them at once
- Sync files between source and destination
- Pick files from multiple folders and compress in single .zip file
- Schedule file backups
- Verify copied files for data integrity
- Retain security attributes of files & folders (ownership/user access)
- Several more hidden nuggets designed to make your file-copy task easier.
This post will show how to monitor a particular folder and automatically organize files from that folder, on a regular basis.
Here is a short video that shows how to achieve this:
Video Transcript:
- In this video, we will organize files from the downloads folder to the office folder.
- Select the Downloads folder, right-click and copy using Copywhiz.
- Go to the destination folder, right-click and choose Copywhiz Paste Advanced.
- The Copywhiz main window will open. Click on the Advanced Settings button.
- In the Destination Tab, choose the option ‘Organize files inside folders based on name, type, date, etc.’
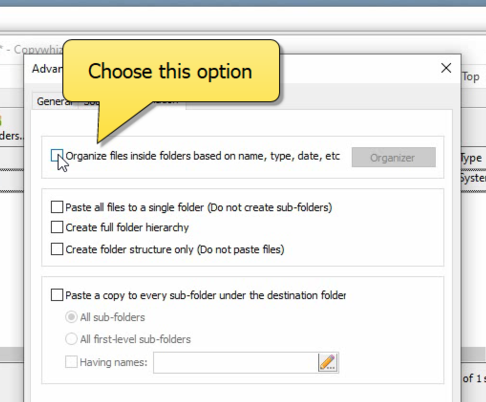
- Click on the Organizer button.
- Under the file property section, choose ‘File Extension’ from the drop-down. This will create separate folders based on the various types of files.
- Click on OK.
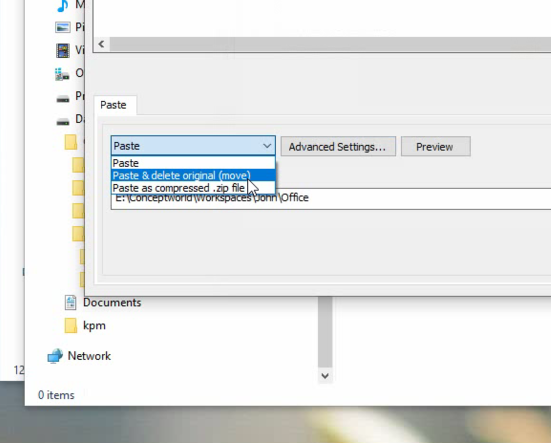
- Since we are organizing files, we will move the files instead of copying them. To do this, choose the option ‘Paste & delete original (move)’.
- Paste the files.
- Check the Downloads folder and you will find it empty. This is because we moved files instead of just copying them.
- To repeat this action automatically at regular intervals, we will schedule the Copywhiz project.
- But first, we need to save the project.
- Click on File-> Save As in the top-left corner of the Copywhiz main window.
- Once the project is saved, click on ‘Paste Later( Schedule).’
- Select the backup frequency and other options based on your preference.
- Schedule this project and it will now perform the action automatically at the time specified!
Who could imagine that you could automatically organize hundreds of files in your system with so much ease! Well, Copywhiz did.
Learn more about Copywhiz. Download the free trial from here.
For short tutorial videos, Check out this page.
Subscribe to our YouTube channel for interesting videos.
Check out our other cool products.
Have a good day!
Thank you :)