 Copywhiz - Flexible File Copy & Backup Tool for Windows.
Learn about Copywhiz.
Copywhiz - Flexible File Copy & Backup Tool for Windows.
Learn about Copywhiz.
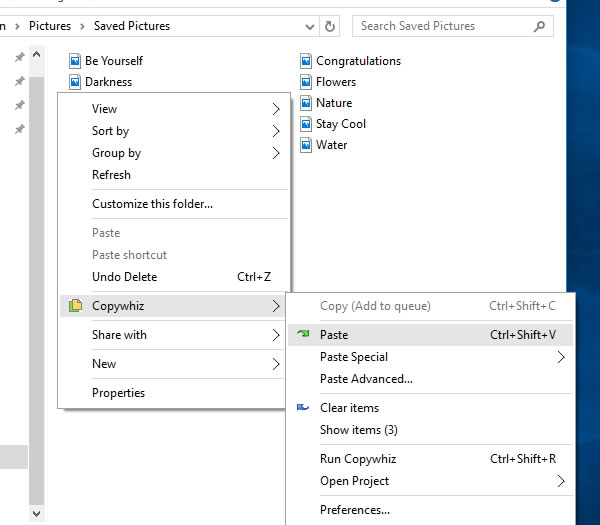
If you have selected files in Copywhiz using the File Explorer (Windows Explorer), then go to the destination folder. Right-click inside the folder, choose Copywhiz → Paste Advanced to open the Copywhiz window and click on the 'Advanced Settings' button as shown in the picture below.
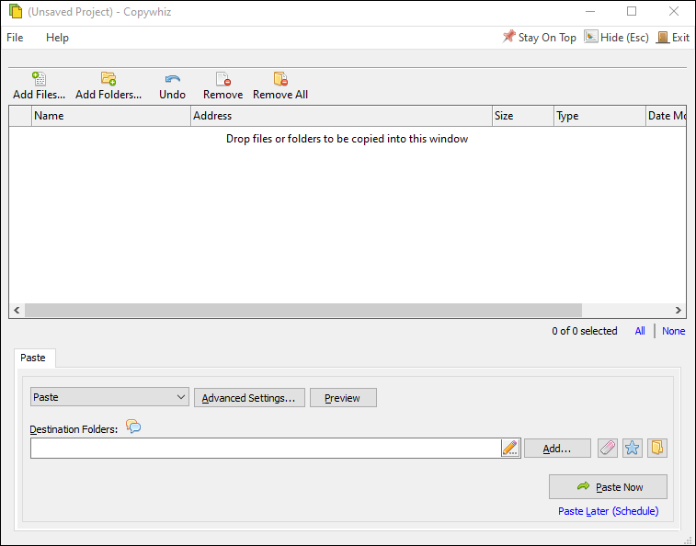
If you have Copywhiz's main window already open, then you can directly click on the 'Advanced Settings' button as shown in the picture below.
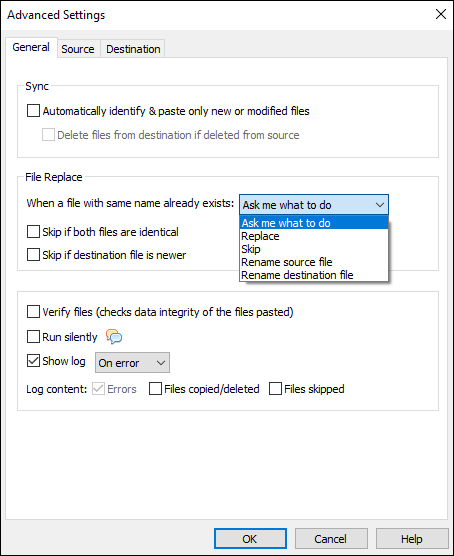
Now check the 'Show log' option to make sure Copywhiz generates a log file if there was an error after copying files.
By default, Copywhiz generates a log file only on error. But you can also change to 'Always' generate log file from drop down-box as shown in the above picture.Press the OK button and click on the 'Paste Now' button to copy files and generate log.