During your file copy process, you may get a warning for high CPU and disk usage. The best thing would be to pause the copy for a while until the other tasks are completed.
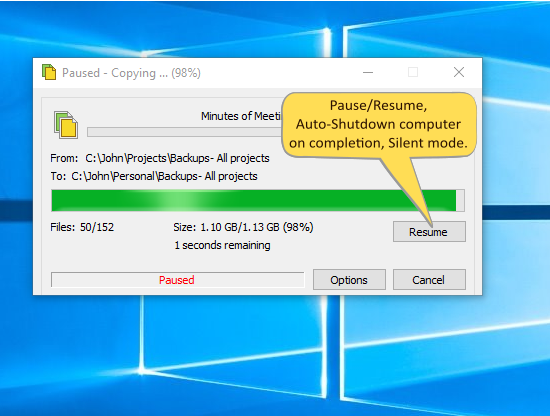
With Copywhiz, if you wish to hold the file copying process, you can pause and then resume right from the point where you paused it. This way, you do not lose the integrity of the file being copied.
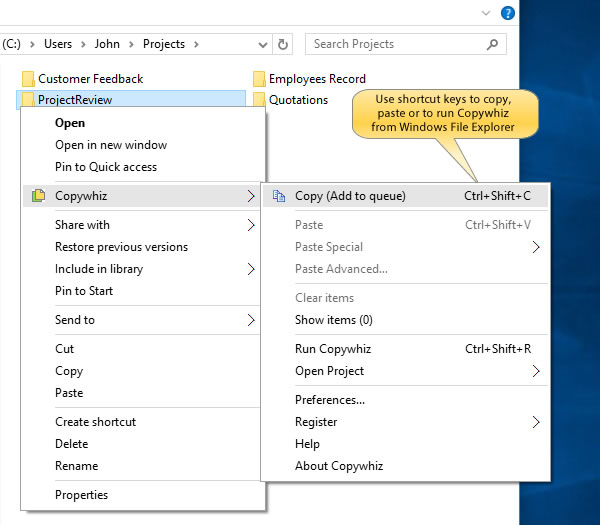
This is not possible with Windows Xcopy tool. However, you can use Copywhiz, a file copy software for Windows. It is really easy and straightforward.
What is Copywhiz?
Enhance your file-copy experience with Copywhiz as it lets you to have more flexibility & more control over the file copying and backup process. Here is how Copywhiz makes file copying a breeze:
- Copy only new or modified files
- Easily pick files by name, extension, folder etc from bunch of folders
- Automatically organize files based on file attributes and metadata
- Copy files to multiple folders/computers
- Copy files from multiple folders and paste them at once
- Sync files between source and destination
- Pick files from multiple folders and compress in single .zip file
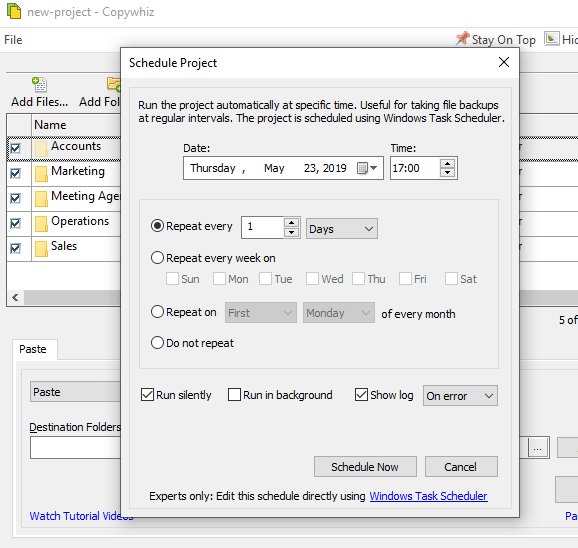
- Schedule file backups
- Several more hidden nuggets designed to make your file-copy task easier.
Steps to Pause & Resume file copy using Copywhiz
Watch a short video depicting this feature:
For more tutorial videos, check out this page.
Video Transcription
Copywhiz lets you to pause and resume file copy in Windows. It lets shutdown automatically/hibernate/sleep after a file copy. It even silently copies files without prompts & error messages. A Log file is also generated. You can Change file copy speed to improve performance. Also, view progress for each file being copied.
It is easy to understand and do it, as shown here. Try it out today.
The biggest advantage of using Copywhiz is that you can take automatic backups of your files and folders! Read more about it here:
Subscribe to our YouTube channel for regular updates and interesting videos!
Learn more about Copywhiz.
Download the free trial from here.
Check out our other cool products.
Have a good day.
Thanks for reading till the end :)